
Error de formato de correo electrónico
emailCannotEmpty
emailDoesExist
pwdLetterLimtTip
inconsistentPwd
pwdLetterLimtTip
inconsistentPwd


Look here! New amplifier module with display
Dear customers and friends, long time no see! In today's technological wave,Aoyue has always been adhering to the spirit of innovation and research. Through our unremitting efforts and after many tests, Aoyue has launched our new product, the amplifier module with display.

1. New amplifier module configuration
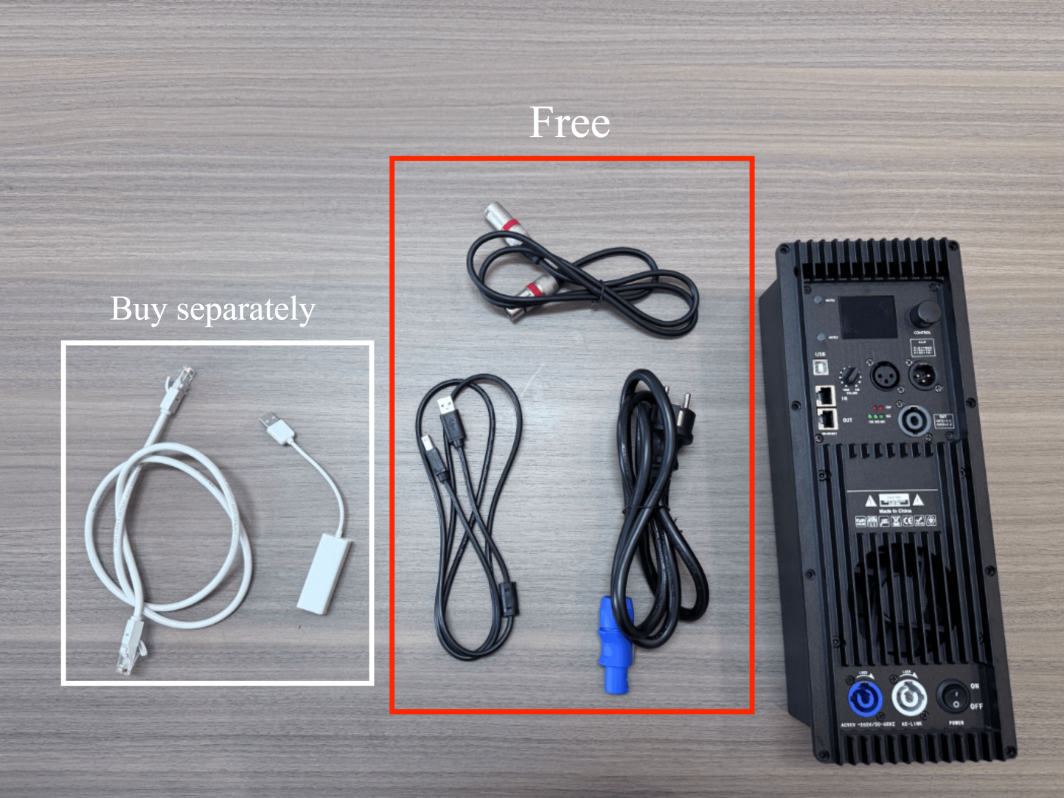
In order to better serve consumers, this time we have equipped customers with free data cables for the upgraded active board. The three black cables shown in the figure are all free, 1 Piece Power cable,1 Piece Single cable,1 Piece USB cable. The white data cable needs to be purchased separately for customers who have already purchased the old version of the amplifier module. The old version of the amplifier module does not have a free data cable to connect to the computer, and the new version is fully equipped. Customers who need it can directly click the link below to purchase the new version:
2. Introduction to the display panel function
The most popular feature for customers is our newly added LED touch screen function. The screen has three main interfaces, corresponding to different functions, but it should be noted that the parameters set on the amplifier module cannot be saved for the next use, so if you need to save fixed parameters, you still need to connect to a computer.
Page 1: Gain adjustment function

This is the first page after we come in. On this page, we can adjust the sound intensity of the input and output channels and save the parameters. The right side is the parameter number that can be saved. There are a total of five groups of parameters that can be saved on the active panel, but there are eight groups of parameters that can be saved after connecting to a computer.
Page 2: Adjust the matrix and phase

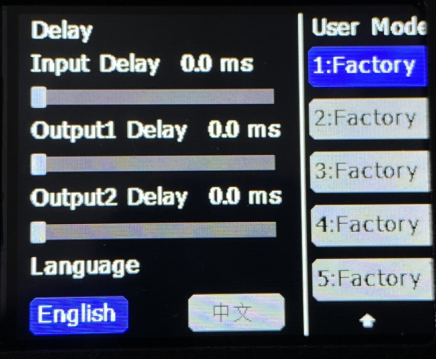
Page 3: Adjust the delay and language settings
The video link for detailed explanation is as follows:
3. How to connect to the computer
First, establish a connection between the amplifier module and the computer device. You can choose the following two methods:
Method 1: USB cable connection (gift for new amplifier module)
Use the USB cable provided in the package, connect one end to the USB port of the computer, and the other end to the corresponding USB port of the amplifier module. After connection, the computer can usually automatically recognize the device.
Method 2: Network cable connection (converter needs to be purchased separately)
Prepare a standard network cable (RJ45 interface), one end of which is connected to the network port of the computer. The other end needs to be connected to the device through a USB to RS485/RJ45 converter. Network cable connection is suitable for long-distance transmission, and data transmission is stable, especially for scenes that require long-distance control. However, it is necessary to pay attention to the compatibility of the converter. It is recommended to choose a converter model that matches the device.
After completing the hardware connection, open the MK-Audio software installed on the computer (the software only supports Windows system operation and is not compatible with IOS system).
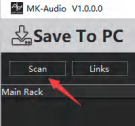
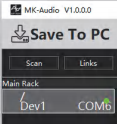
The main interface of the software is divided into multiple functional areas, mainly including Save To PC, Scan, Links and other buttons, as well as the data transfer progress display window.
Detailed operation process:
1. Click the Scan button: After opening the software, first click the "Scan" button in the interface. The software starts searching for matching devices in the port connected to the computer.
2. Search for devices: The software will automatically traverse all connected ports to find connected devices. This process may take from a few seconds to more than ten seconds, depending on the computer configuration and the number of connected devices.
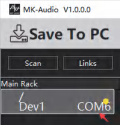
3. Waiting for loading: When the software finds the device, it will start to establish a connection and load the device information. At this time, the software interface will display a progress bar, which will gradually fill up and show the connection progress percentage.

4. Connection successful: After the progress bar is filled, the software will prompt that the connection is successful. At this time, the device and the computer have successfully established communication, and subsequent data transmission, parameter setting and other operations can be performed.
IV. Notes
1. Device connection failure handling: If the device fails to connect to the software successfully, please close the software first, restart the software and try to connect the device again. Sometimes, the software may not recognize the device in time when it starts, and restarting can solve some connection problems.
2. It is recommended to use the specified connection cable: It is recommended to use the USB cable provided in the device packaging, or purchase a USB to RS485/RJ45 converter that matches the active board to connect to the computer. Using non-specified connection cables may affect the stability of the connection and even cause a failure to connect normally.
3. Software download link: If you need to reinstall or update the software, you can visit the official software download link. When downloading the software, please make sure that you download the version that is suitable for your computer system and install it correctly according to the installation wizard.
Following the above guidelines, you can successfully connect the amplifier module to the computer and successfully run the MK-Audio software for related operations.
For detailed video explanation, please click the link below: